
Vacuum Screen Printing Table
Save a ton by building your own.
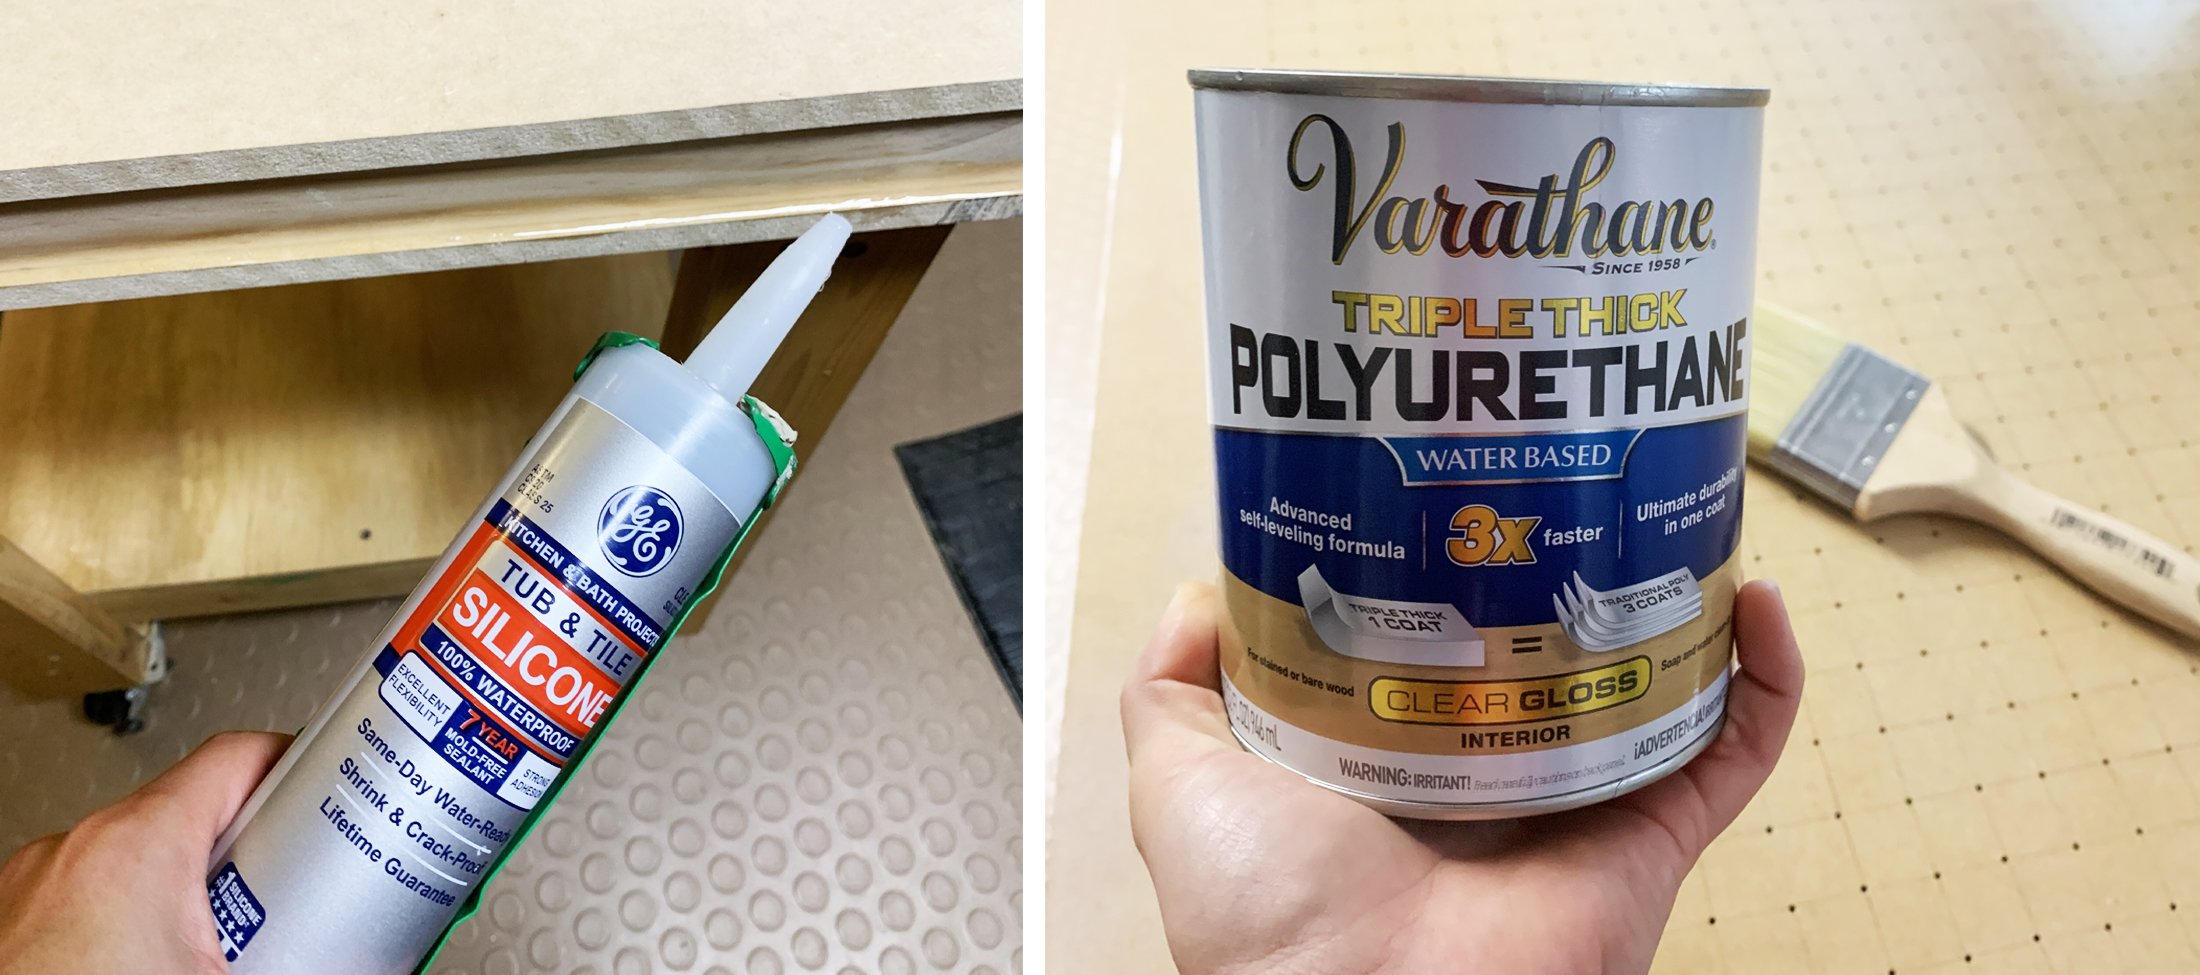
Building Materials: 0.5’’ MDF board, 0.75’’x1.5’’ pine, wood glue, silicone caulk, flange, shop vac, screws, sealant, hinge clamps (If also building workbench base: 2’’x4’’ studs, 0.5’’ plywood, caster wheels)

1
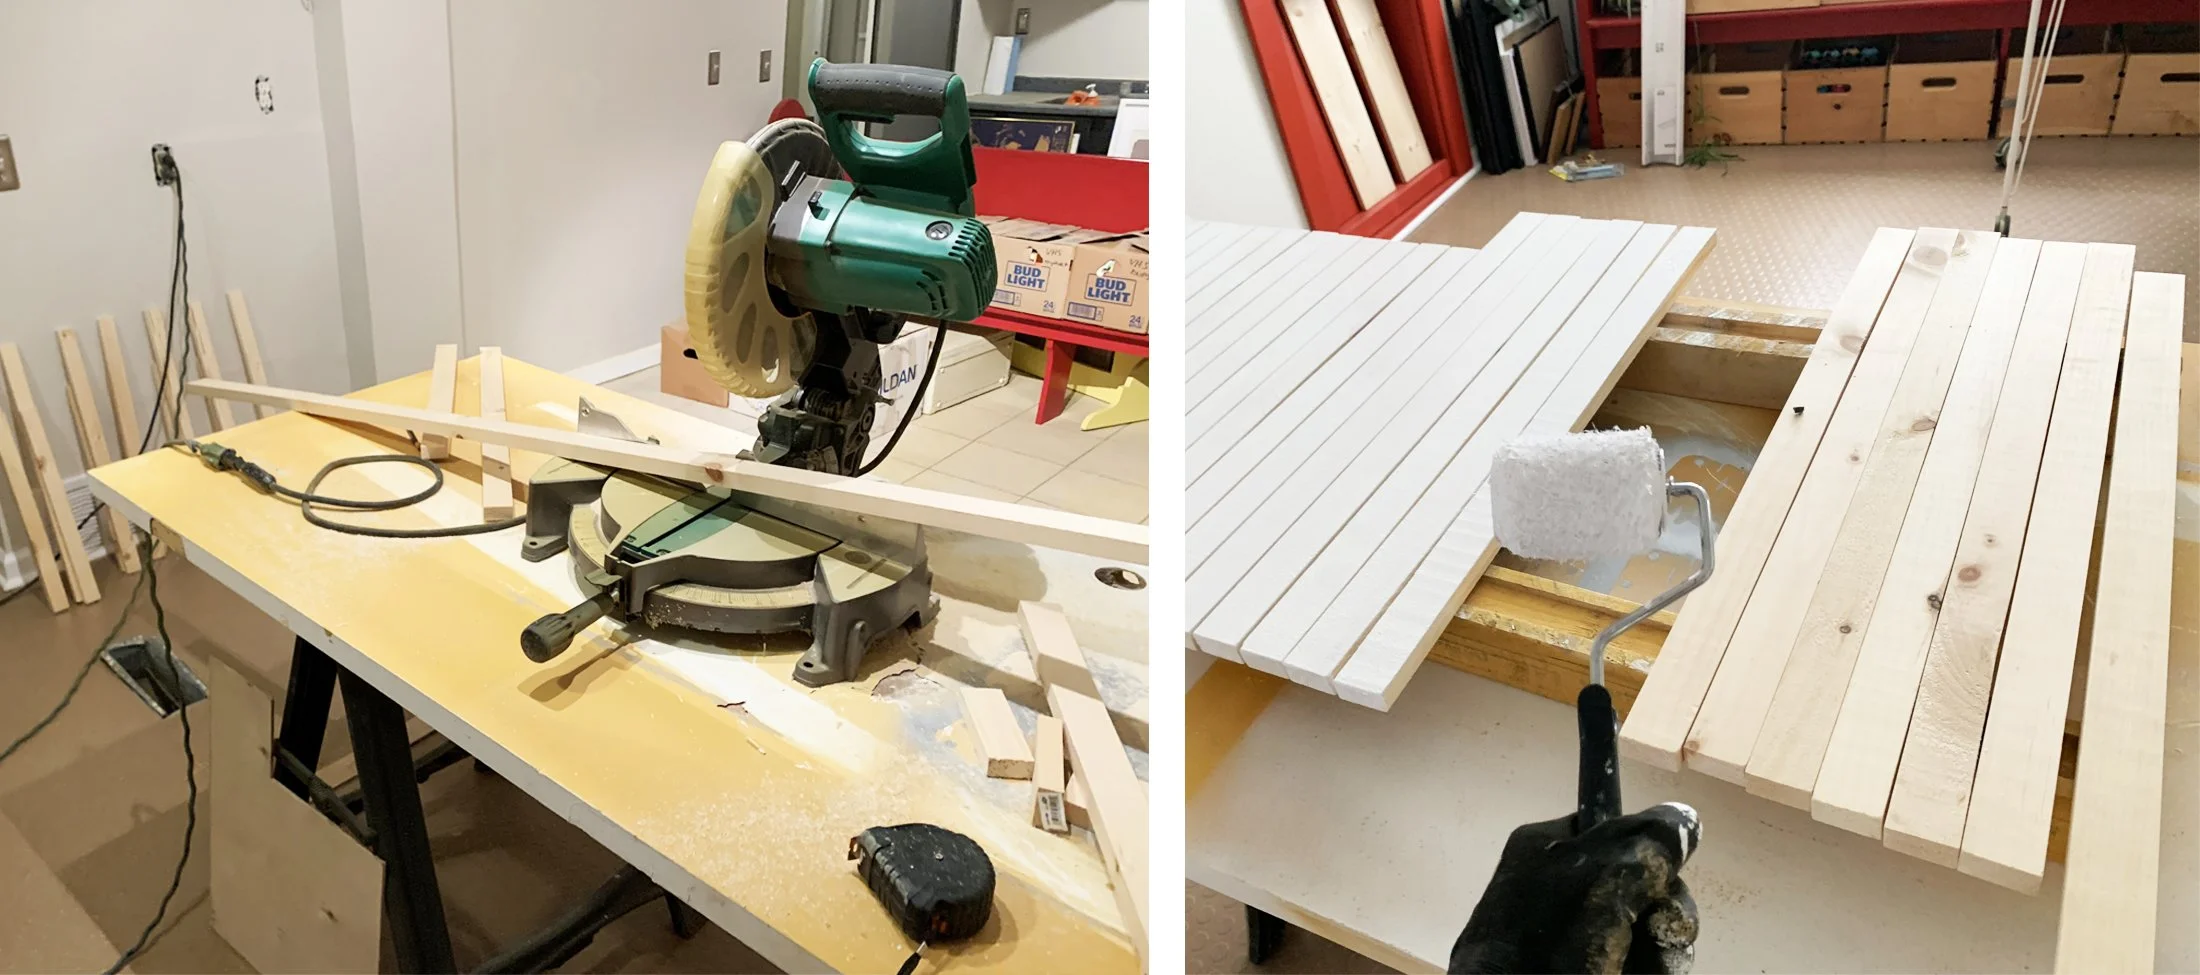
Cut two identical sheets of 0.5’’ MDF board to your desired table size. (I wanted to accommodate my largest screens so made mine 35’’x49’’.) Then cut your 0.75’’x1.5’’ pine to size, creating full edges for your boards.

2
Using wood glue and clamps, attach the pine edge pieces flush to the edge of one piece of your MDF board.
Let dry fully before removing clamps.
3
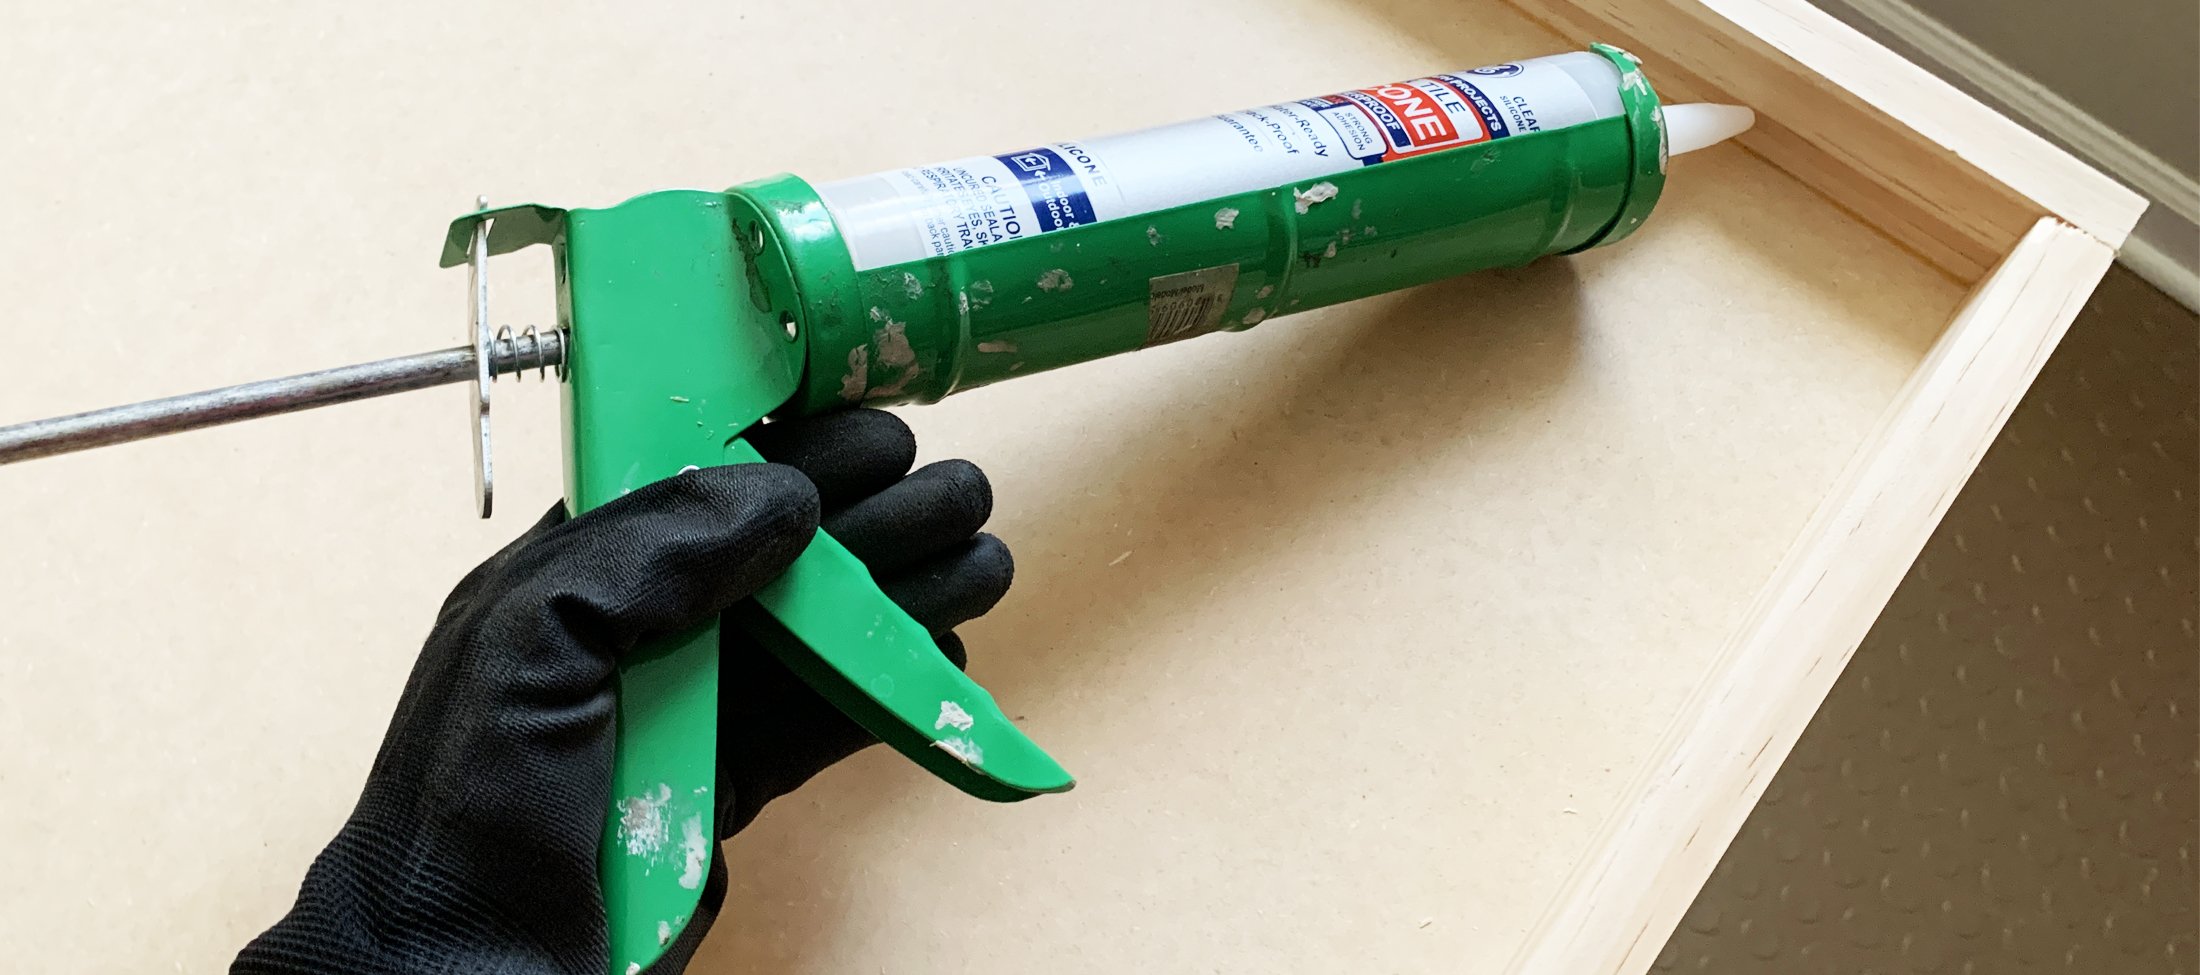
Caulk the interior seams with silicone sealant for added air tightness.
You could use any caulk but I like the silicone, I usually smooth into the edge with my finger.

4
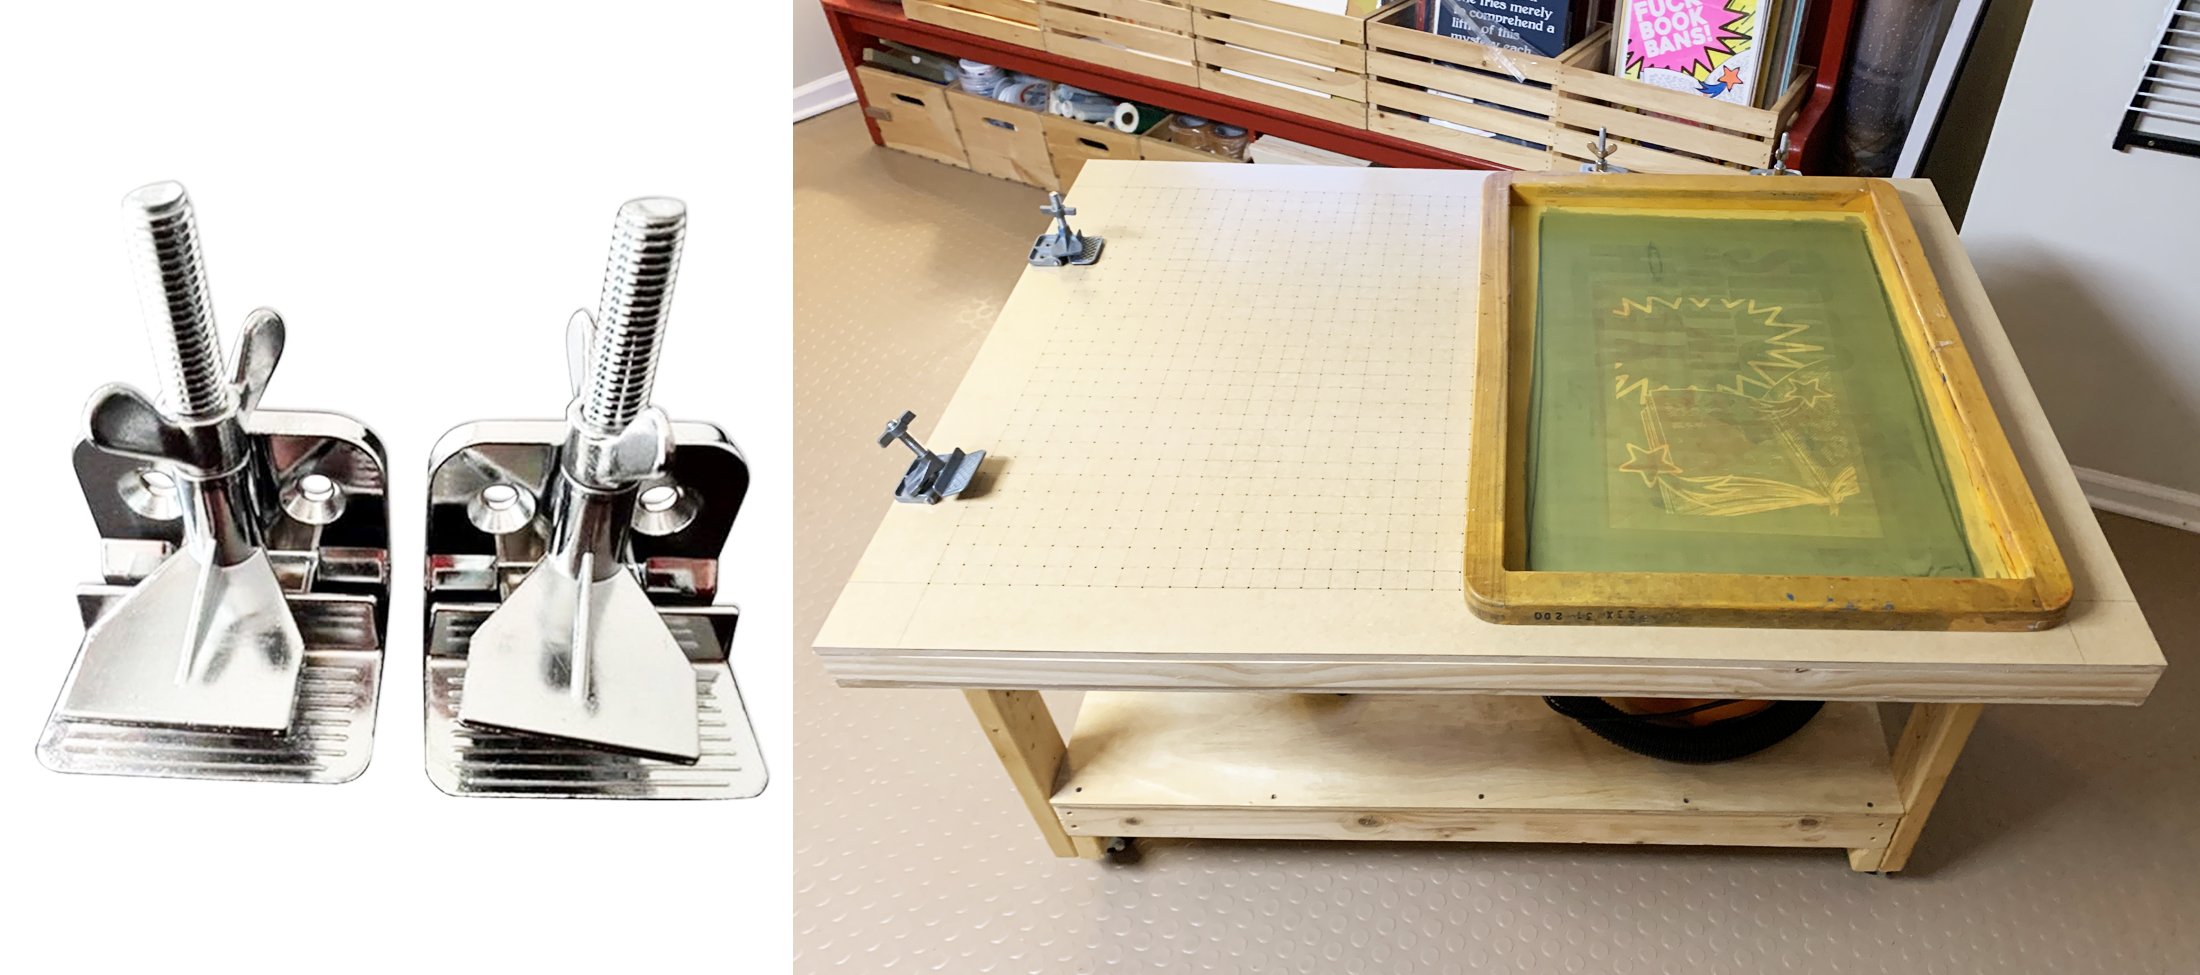
Flip this piece, draw a 1’’ grid onto the smooth top. Leave a 3’’ ungridded border around your grid, this leaves enough space for the hinge clamps to fit nicely.
You can use a clear sealant at this step as well, after gridding is complete. You could also stain or paint your table as you like after the holes are drilled (next step).
5
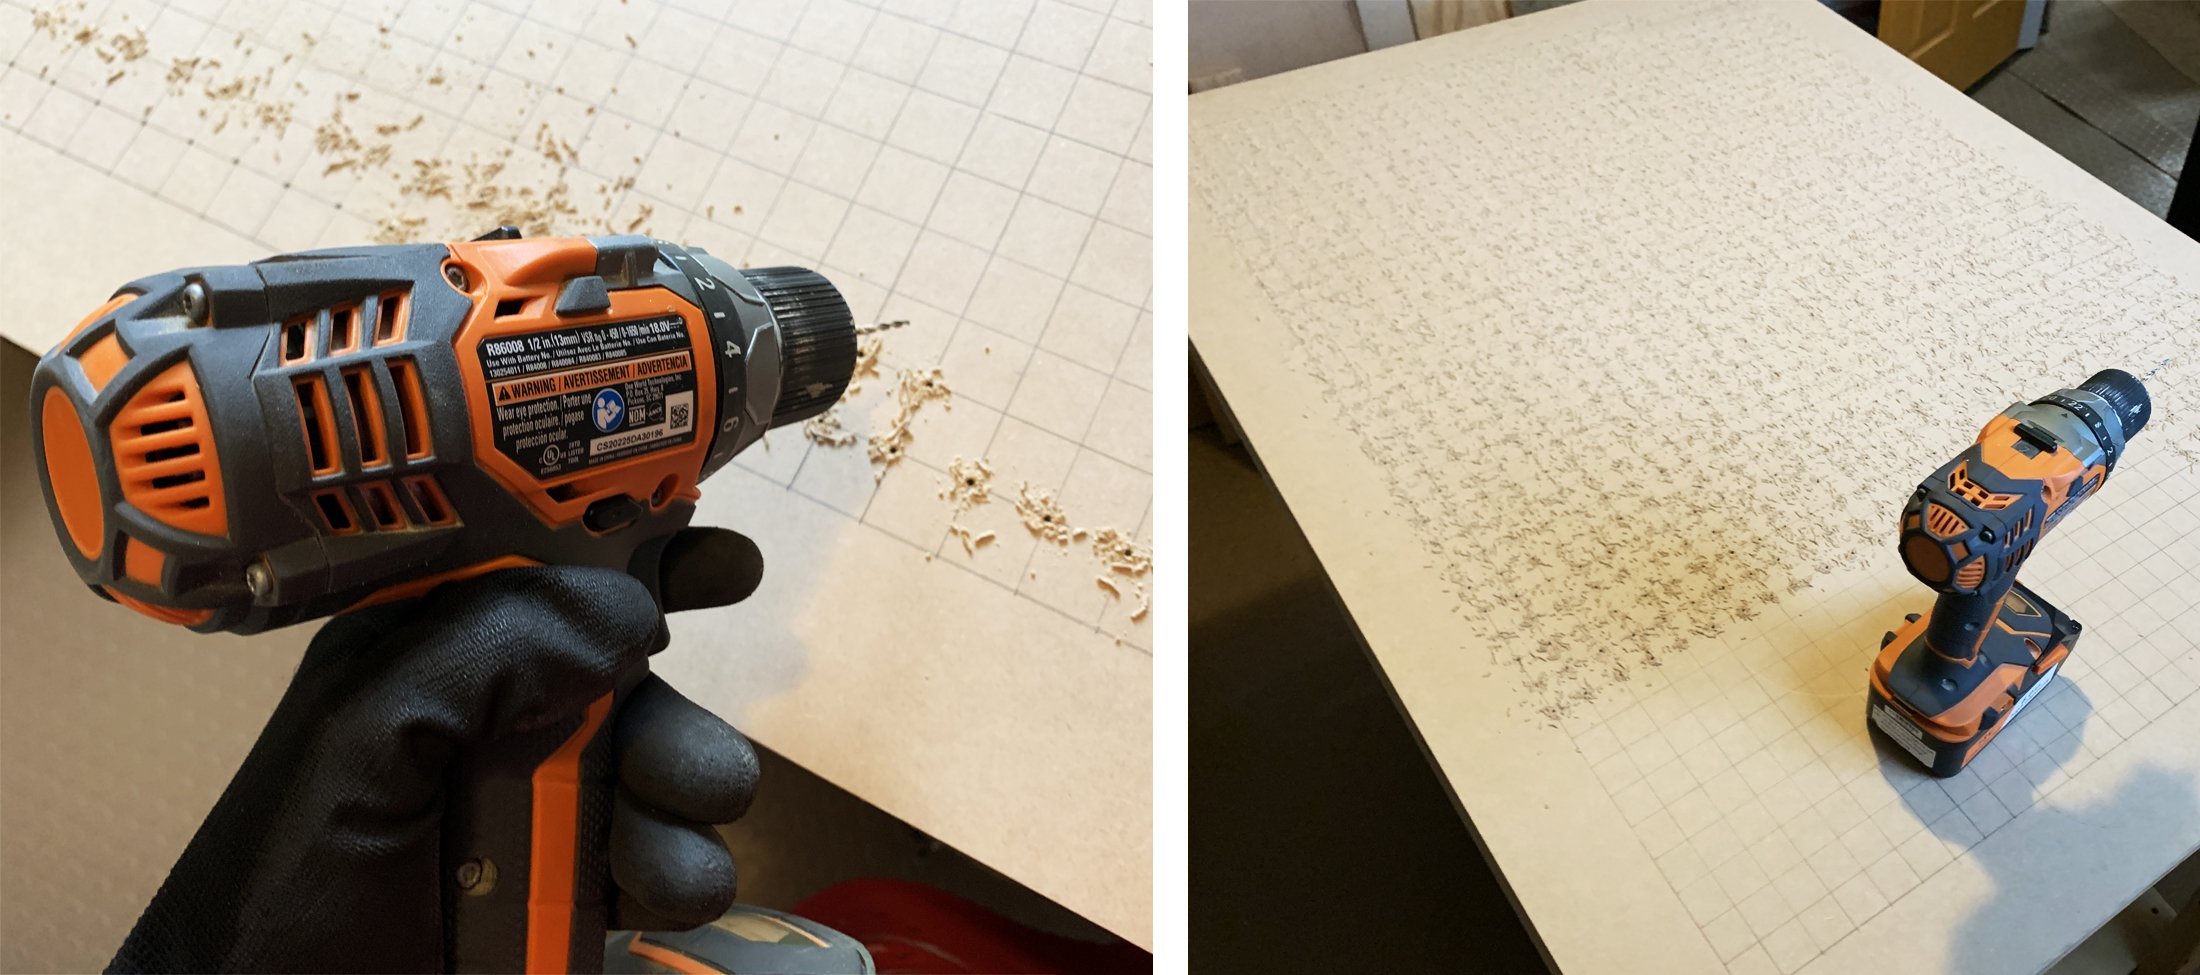
Drill holes at each corner point of your grid marks, I used a 3/32 drill bit. This will be A LOT OF HOLES. (Mine was 1247!) MDF is a nice material not only for its overall smoothness but because it is easier to drill through than woods. Maybe do it in sections and not all at once, to save your wrists and arms.
Once finished, clear the shavings and lightly sand the top to smooth.
6
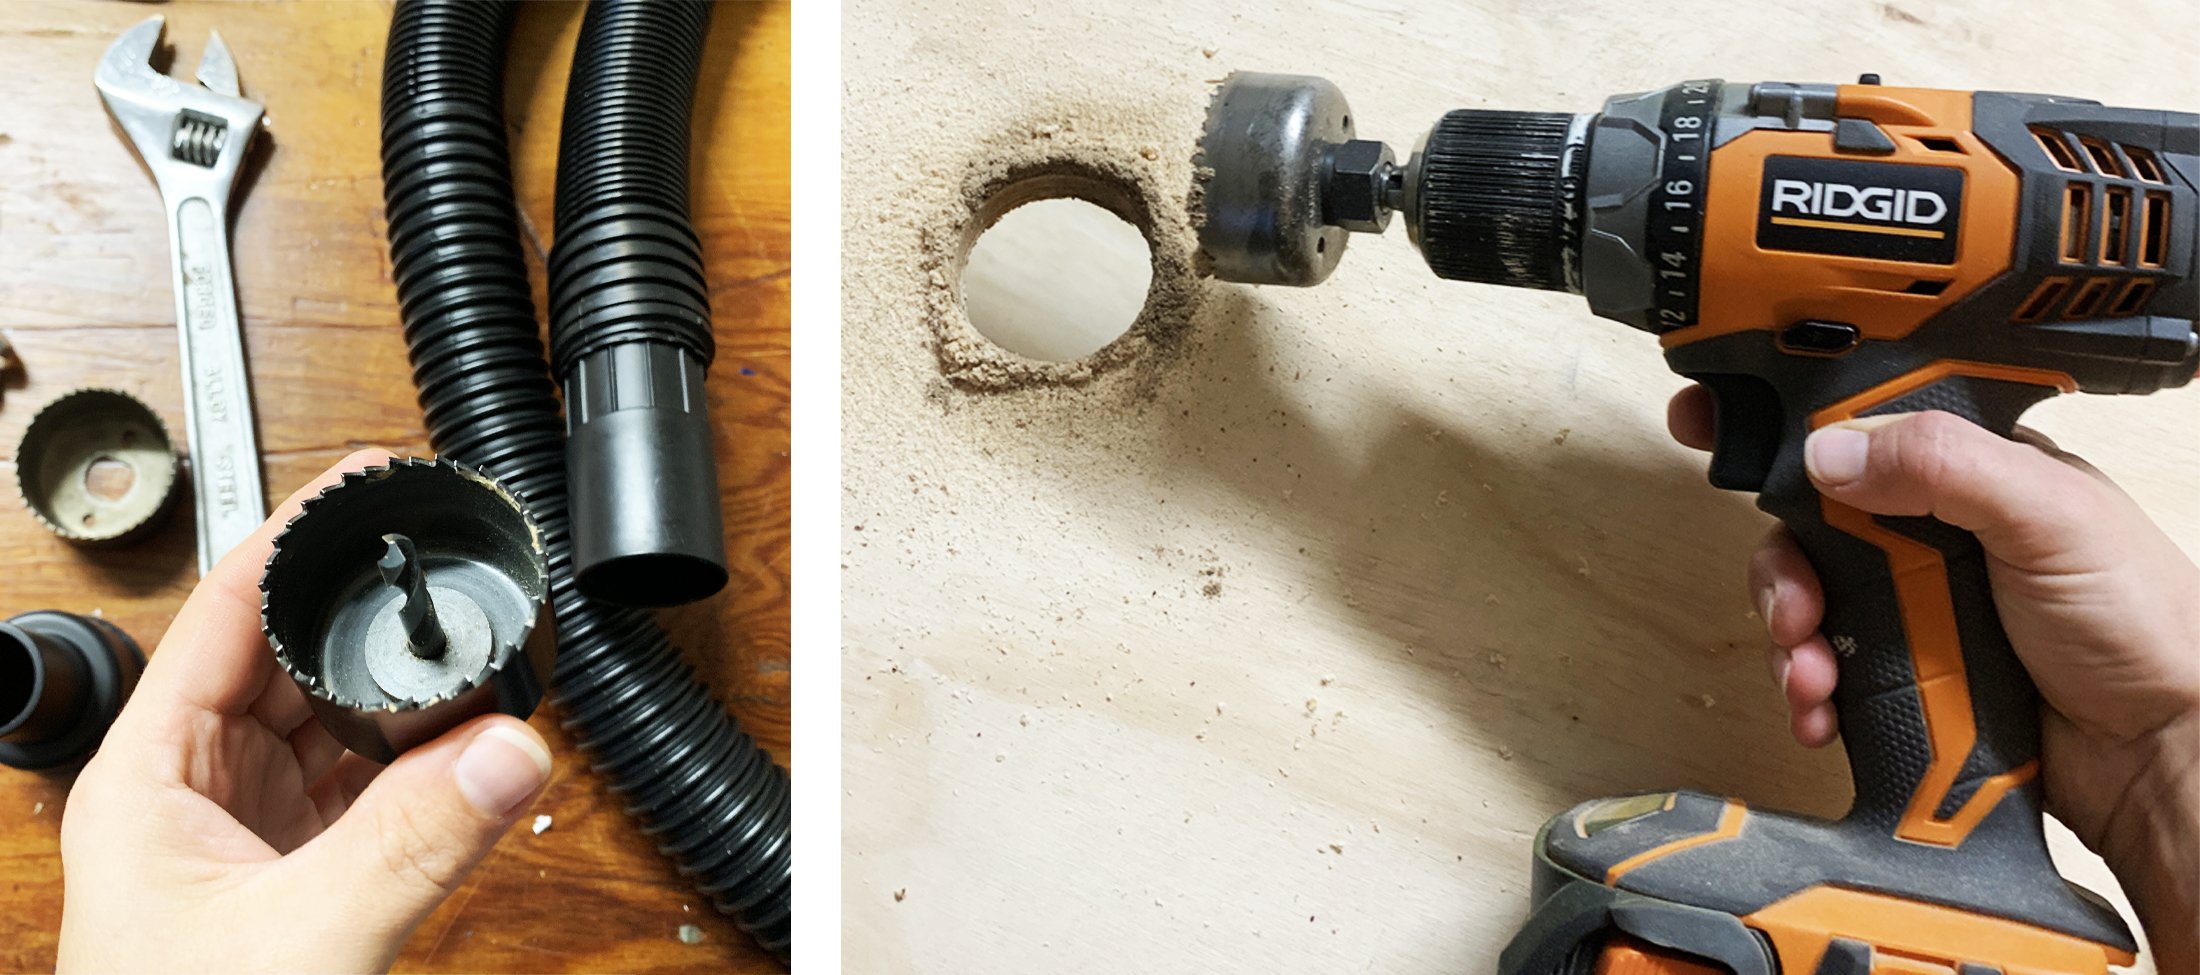
Find a flange that fits your shop vac hose, I was able to find an attachment kit with a piece that worked. Cut it down if needed to make it near flush with interior when inserted into table. Use a circular wood bit a smidge larger than your flange to drill a hole in your other piece of MDF board (ungridded). Placement of hole will depend on your setup and vacuum/hose. I centered mine and moved it slightly to the rear. Flange should slide snugly into hole, seal edges with silicone.

7
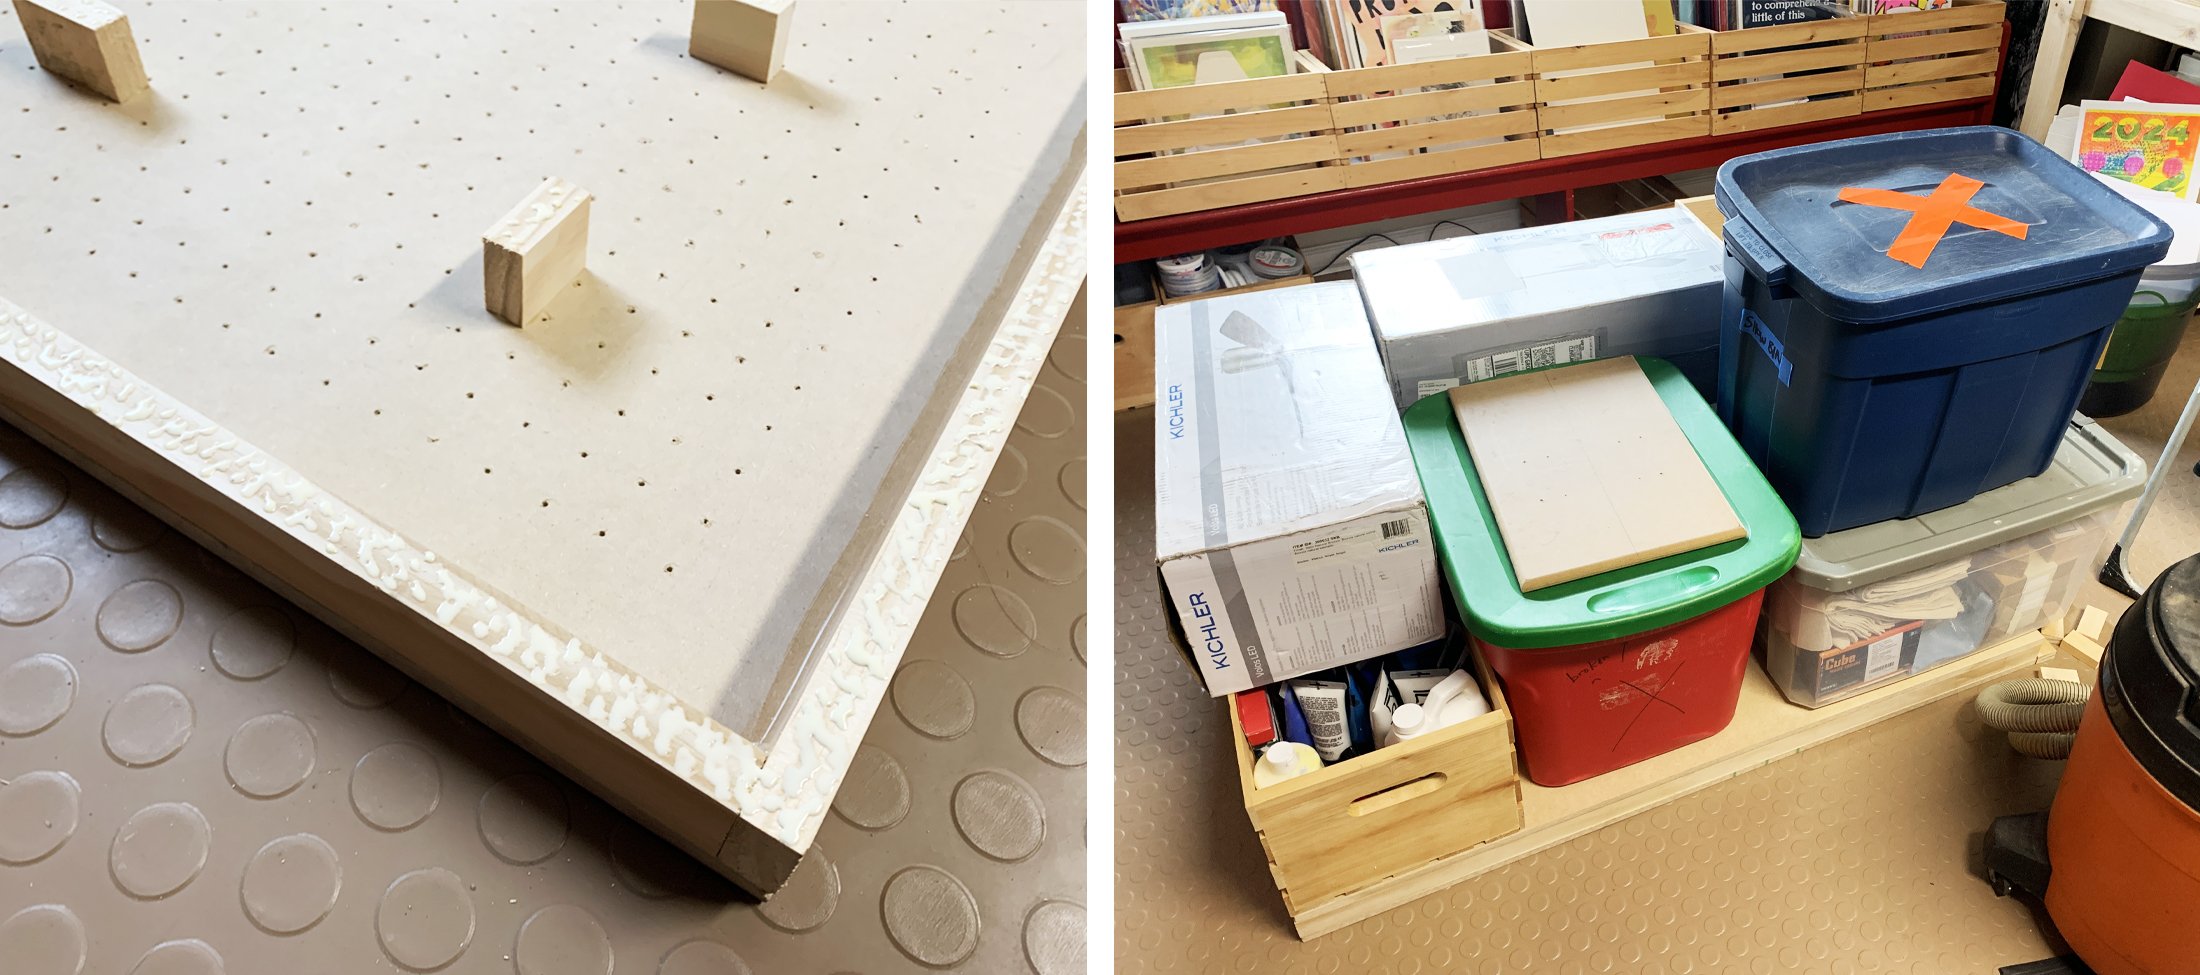
Create support bits to prevent any potential table top sag by cutting small pieces of your 0.75’’x1.5’’ pine. Using the same wood you used for edging ensures that the height is exactly the same. I cut mine a couple inches long each, spaced somewhat evenly in between holes and in alternating orientation to allow best air flow. Be sure not to block any of your air holes with these bits! Glue them to the underside (inside) of this piece.
8
Next apply glue to the exposed sides of the little support bits and to all of your edges. Place your other MDF board (with the flange) on top of everything. Make sure you have the orientation correct (interior / exterior). Square it up before weighting and/or clamping the whole unit. Be sure not to pile anything directly on top of your flange.
Let glue dry completely before removing weights/clamps.
9
Seal all exterior edges with silicone for extra air tightness. Then seal your completed unit with a clear varnish. I used a couple coats of a water-based polyurethane, sealing the top and sides of the unit. It’d make more sense to seal the top at Step 4 (but alas I did not), before you drill because the holes may clog and require more drilling to clear them. Pro tip: you can attach your vacuum to your flange and suck the varnish out of the holes while wet.
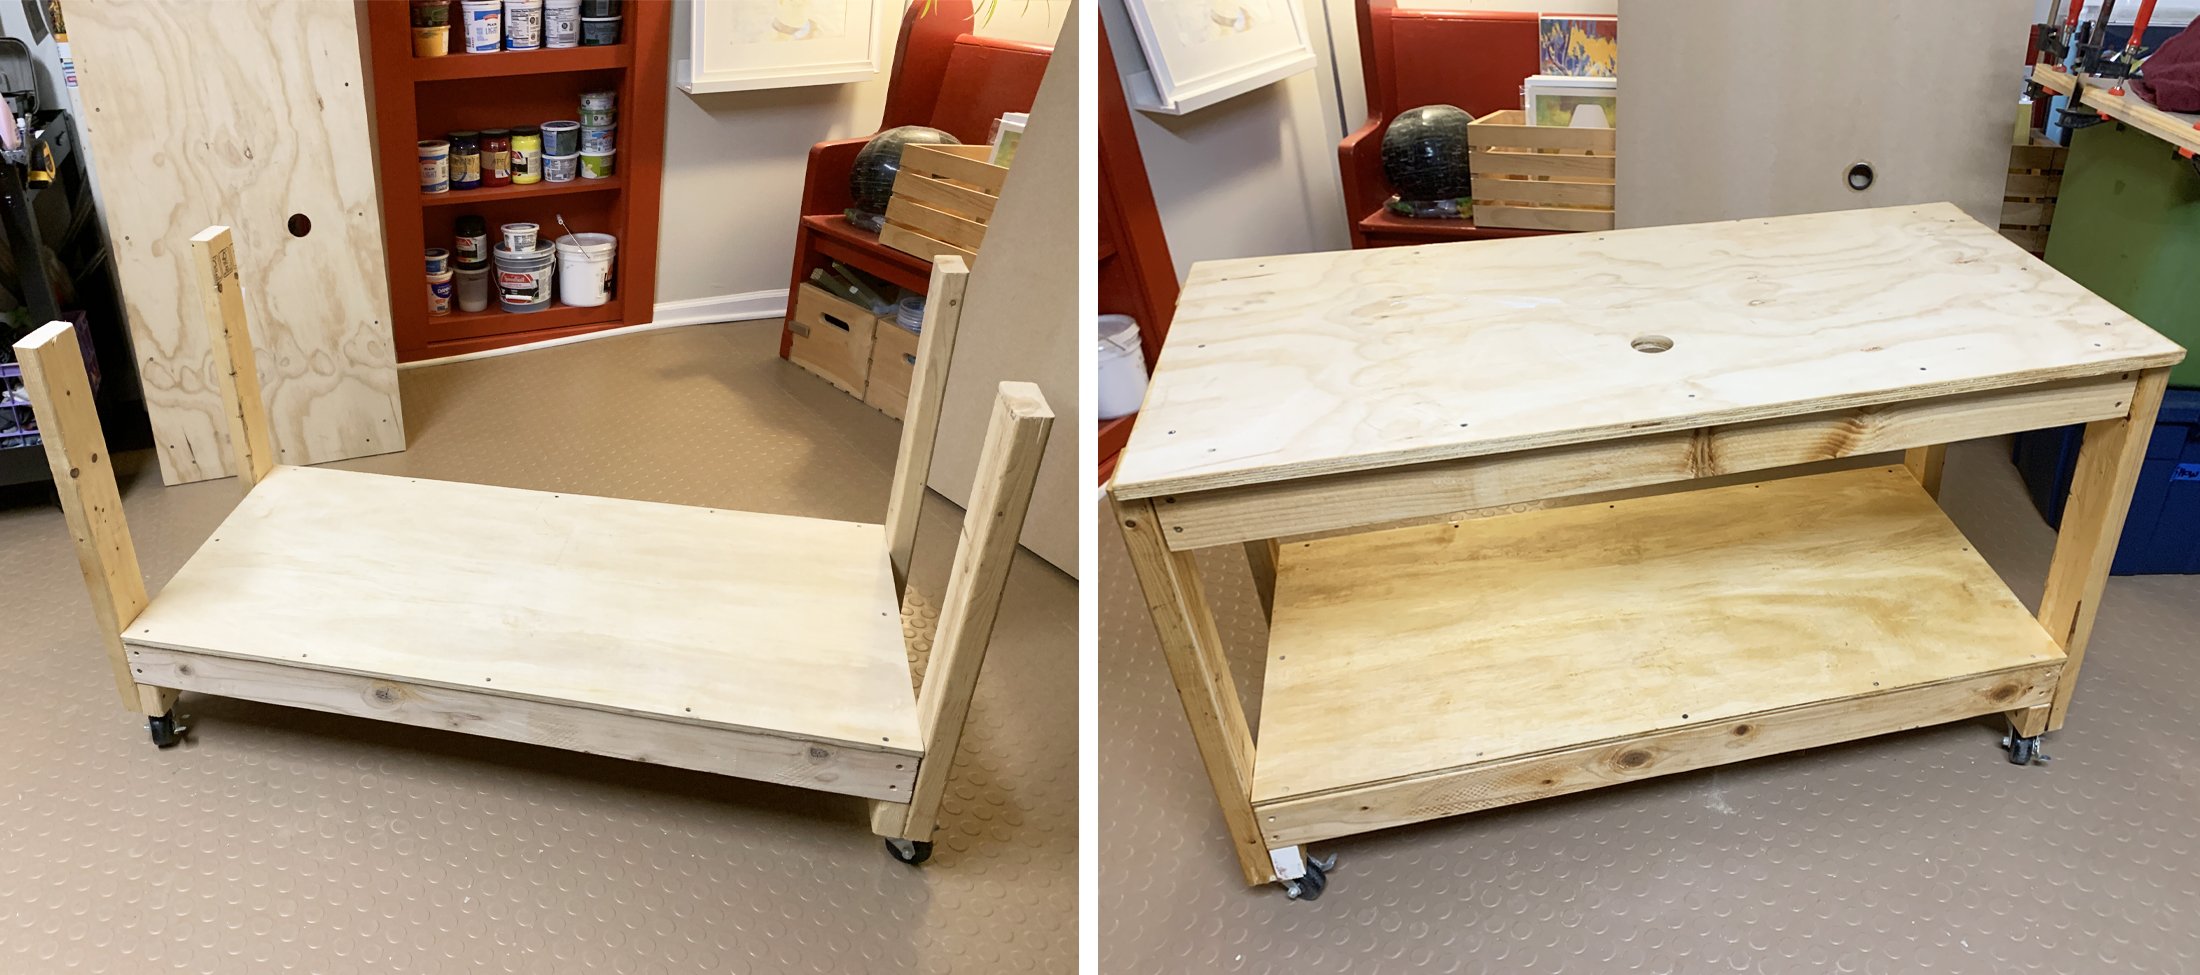
10
I mounted my vacuum table onto a basic workbench structure for its base (tutorial for building this workbench below). You could use any table. I had already built a workbench on wheels, I shortened the legs to my desired height. I drilled a hole into the workbench top with the same circular drill bit that I used for the flange. I then placed the finished vacuum unit on top, aligning the flange and the hole, before securing the two parts with screws from the underside. For good measure, I put some silicone caulk around the screw holes.

11
Connect your vacuum hose to your flange on the underside of the table. I used a compact 6-gallon shop vac with 3.5 horsepower.
For easy vacuum on/off control while printing, I added a simple 3-prong foot switch pedal (only around $10.00).
12
Last but not least, attach your screen printing hinge clamps with screws and you are ready to go! I love the more precise registration you can get using the vacuum table’s suction.
Since I made a large table, I have two sets of clamps (one for the extra large screens and one on the other side for mid- and smaller-sized screens).

Sprayout Booth
Go big (or medium) without breaking the bank.
Building Materials: utility tub (with corresponding plumbing), clear corrugated PVC roof panels (26’’x8’). 2’’x4’’ studs, screws + washers, silicone caulk, hose with sprayer handle, pressure washer (Optional: door stoppers ‘feet’, 3M double-sided tape, backlight fixtures)

1
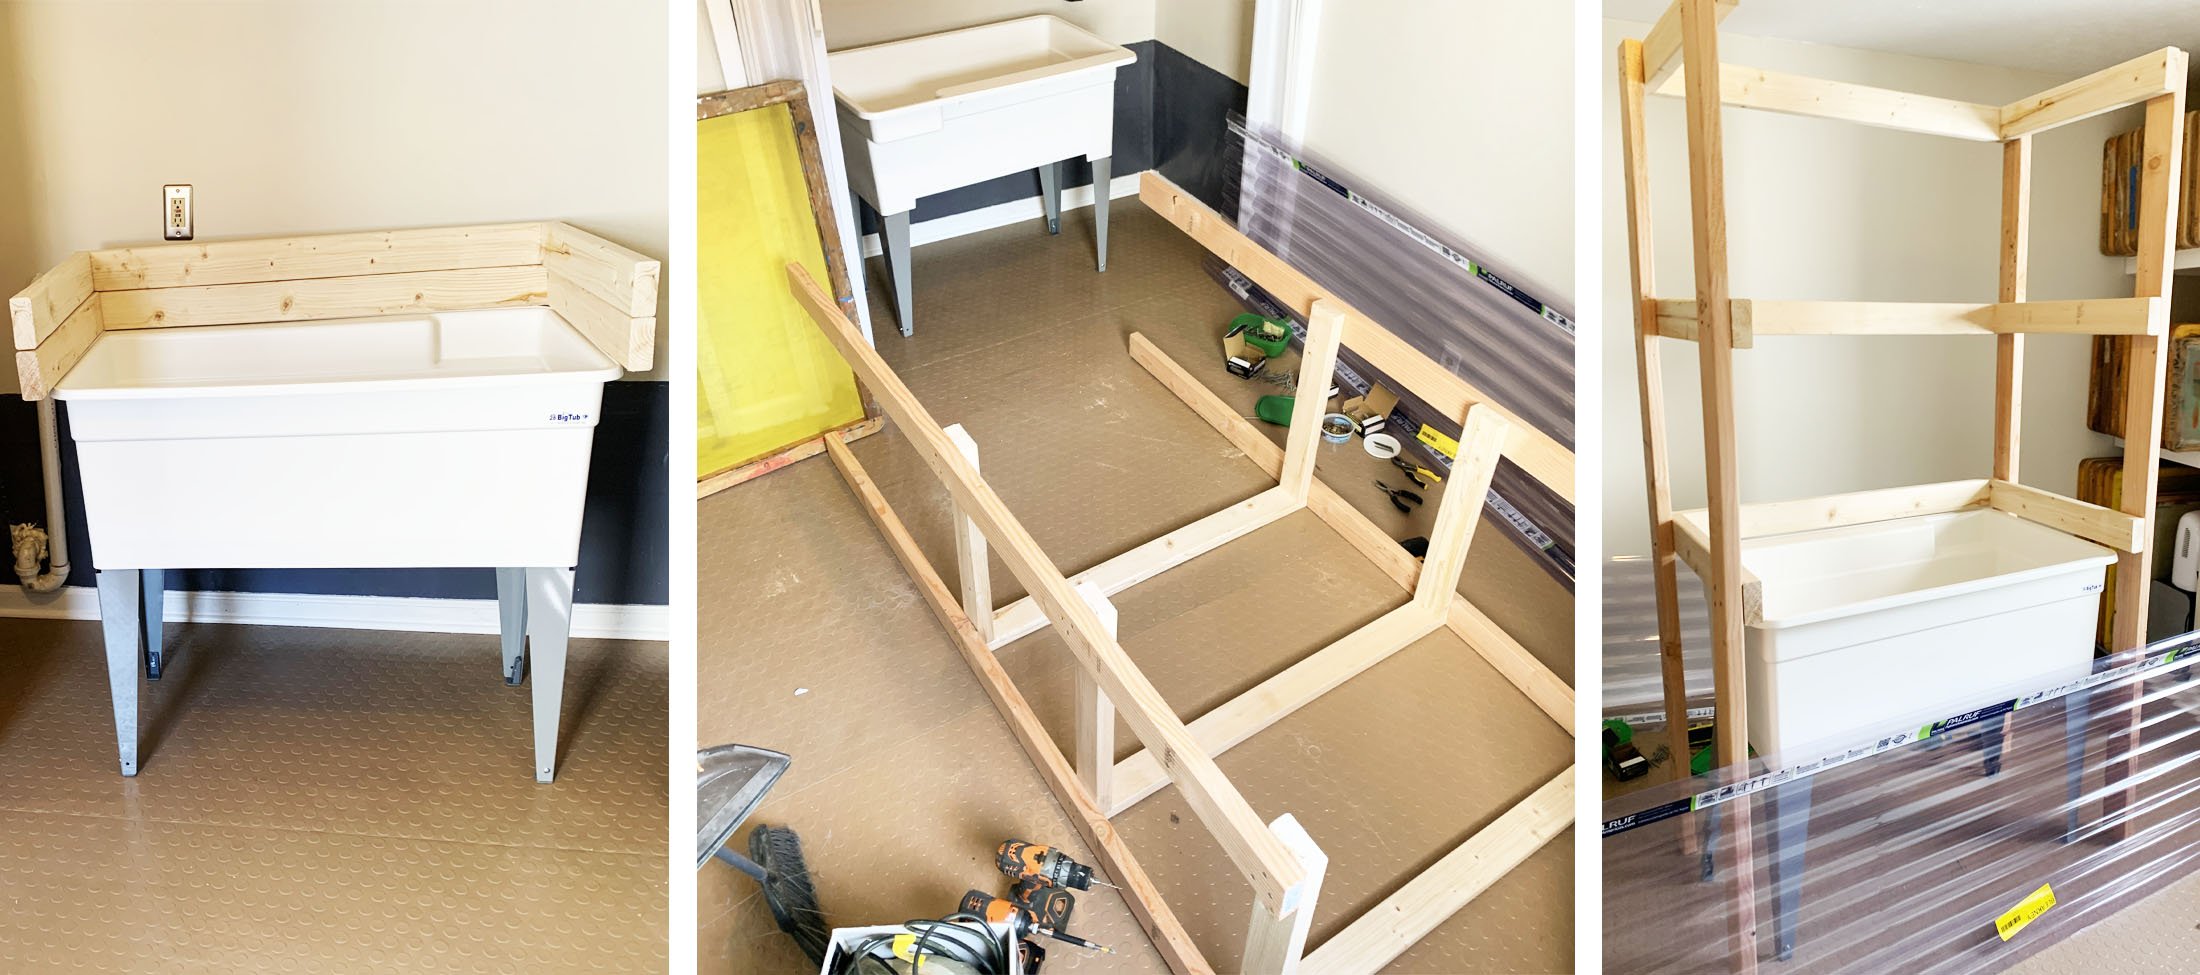
Find your utility tub. I have very large screens so chose a single basin tub sized at 39’’x23’’ (basin depth of 13’’). For smaller and mid-sized screens, you can go smaller with a more typically sized utility tub. Assemble sink and legs as needed based on your tub.
2
Build your standing frame with the 2’’x4’’ studs, sized to be a snug wraparound for the tub. I constructed three U-shaped structures and attached legs to the exterior of each. I placed one right above the tub edge, one in the middle, and one at the top of the frame. Size your leg height based on your overall space and maximum screen size. Make sure your frame extends higher than your tallest screen to catch the water spray. I went as high as I could while fitting inside my closet area (80.5’’).
3
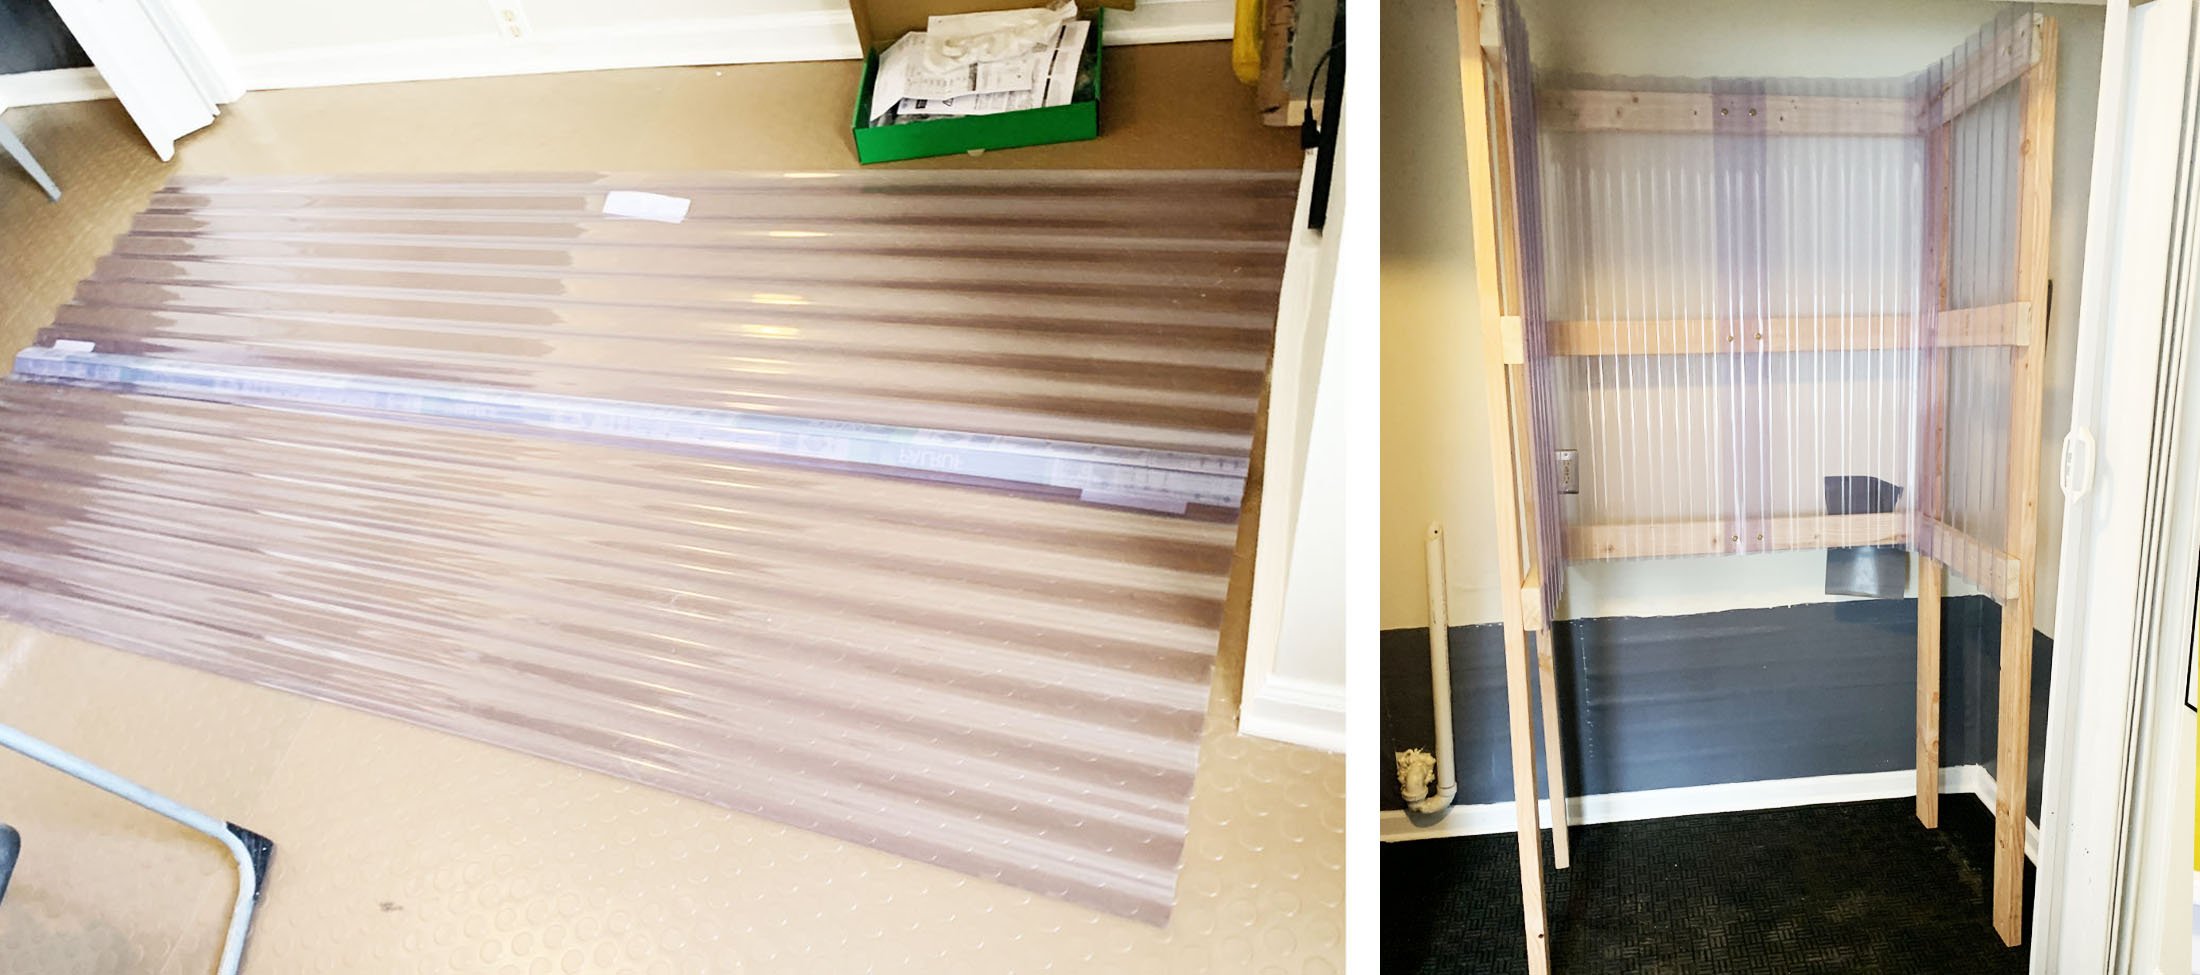
Cut your corrugated PVC panels into three pieces, again based on the size of each interior side of your standing frame. Size longer than each side to allow overlap, ensuring more water-tightness. Nest together the corrugated ripples over the corners. With screws (and washers on the back side of PVC), attach the back panel first before overlapping and attaching the left and right sides.

4
Position the entire unit into place, as it needs to be to attach your plumbing. Connect plumbing as needed based on your setup. Also connect your hose and pressure washer to your water source. Use your silicone caulk to seal the full length of the small gap running between the top of the tub and the bottom of the PVC panels.

5
Optional: Add feet to the interior bottom of the tub's basin to serve as screen holders. While optional, I’d highly recommend this to hold screens in place while spraying. It is a very easy and cheap solution: I used these dome-shaped plastic door stoppers. I adhered them with heavy-duty 3M automotive double-sided tape. They are still attached and going strong.

6
Optional: Attach backlights directly to the standing frame on the rear of the unit to help visibility when making and reclaiming screens. I had some old long fluorescent type units that I used for mine. Game changer for sure if you can add these.

Screen Drying Dark Room Closet
A simple and effective space-saving screen drying storage solution.
Building Materials: 0.75’’x1.5’’ pine, your choice of nails/nail brads/screws (Optional: paint, 2’’x4’’ studs, fan, extension cord)
1
Cut all of your 0.75’’x1.5’’ pine to size. Based on the size of your dark room closet (this can be applied to any light-tight space you are using as a dark room with a right angle on its interior), determine the lengths of your corner pieces. We are creating an L-shape with the pine pieces in the corner which screens will rest in while drying. This is a simple yet great design because having the screens nestle into the corner L-shape means you can store a variety of different sized screens in the same drying unit.
I sized my pine to 20’’ and 26’’, and had a total of 13 ‘Ls’ (so I cut 13 of each size). Optional: paint these the color of your choice once cut, not necessary but do it if you feel like classing up the joint.

2
Using a level, attach the pine pieces to the corner of closet, creating your first L-shape. Leave enough space in between each ‘L’ for your screens to fit somewhat snugly (for me that was a 1.5’’ gap, which meant I could just use a piece of pine as my guide for the following). Repeat until you’ve attached all your pine pieces. I used a nail brad gun, which is fast and easy - but you could also use regular nails or screws to attach.
I have some very large screens (30’’x42’’) and I wanted to leave room to lean them in bottom of my closet, so I started my ‘Ls’ about midway up the wall installed moving upward.

3
Optional: I have an outlet in the closet so I added a fan to the top of the setup for air circulation and quicker drying. Due to closet size, I was able to use leftover 2’’x4’’ stud pieces to rest the fan on. For wider closets, you’d need to build out wider structure to secure the fan.
CLOSET BACKSTORY BUILD:

For my closet, I sectioned off and built out a smaller section of a pre-existing space to use for the screen drying area. (The other side of this space houses the sprayout booth.)

I cut out a new door with a reciprocating saw.

I built a new separating wall reusing old 2’’x4’’ studs and all my random drywall scraps. After all the patching, trim and finishing, I installed an accordian door and the pine slats for screen storage.

Super Stacked Flat File Studio Table
Step-by-step coming soon.

Basic Workbench + Giant Storage Shelves
Step-by-step coming soon.

Wood Organization + Storage Cart
Step-by-step coming soon.
IKEA Hack Storage Corner Desk
Step-by-step coming soon.